Loading the firmware into a ptFlex flight controller requires a dedicated ISP serial programmer, designed for the ATmega line of microcontrollers. The recommended approach is to use an Arduino board such as an Arduino Uno to serve as the programmer for the ptFlex controller. There are other options such as the AVRISP mkii or the UsbTiny, but the exact process is not covered in this document as it requires external drivers or working outside of the Arduino IDE ecosystem.
The latest firmware can always be found on Custom Digital Services GitHub site. Begin by downloading the firmware - you can clone the repository using Git, or you can just download the ptFlex folder to your local PC as a .ZIP file.
Setting up the Programmer
An independent ATmega programmer cable is required for programming the ptFlex flight controller. Using a spare Arduino Uno or similar, launch the Arduino IDE software. Plug the Uno Programmer board into the USB port and wait for it to be recognized.
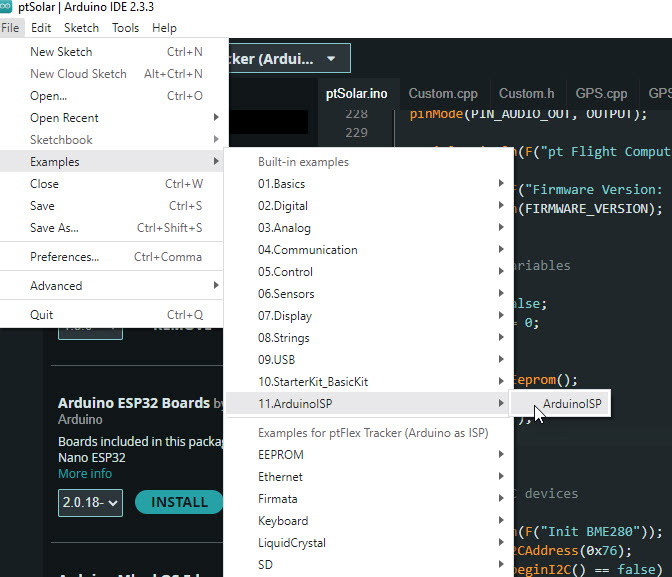
In the Arduino IDE, go to File -> Examples -> ArduinoISP -> Arduino ISP to open up the programmer firmware.
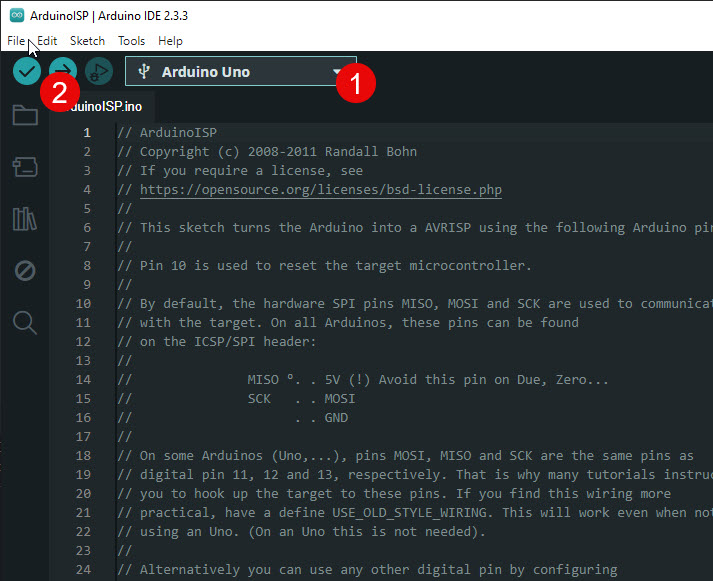
When the ArduinoISP Sketch is opened, select the Uno device from the drop-down list at the top, and click the Upload button in the toolbar.
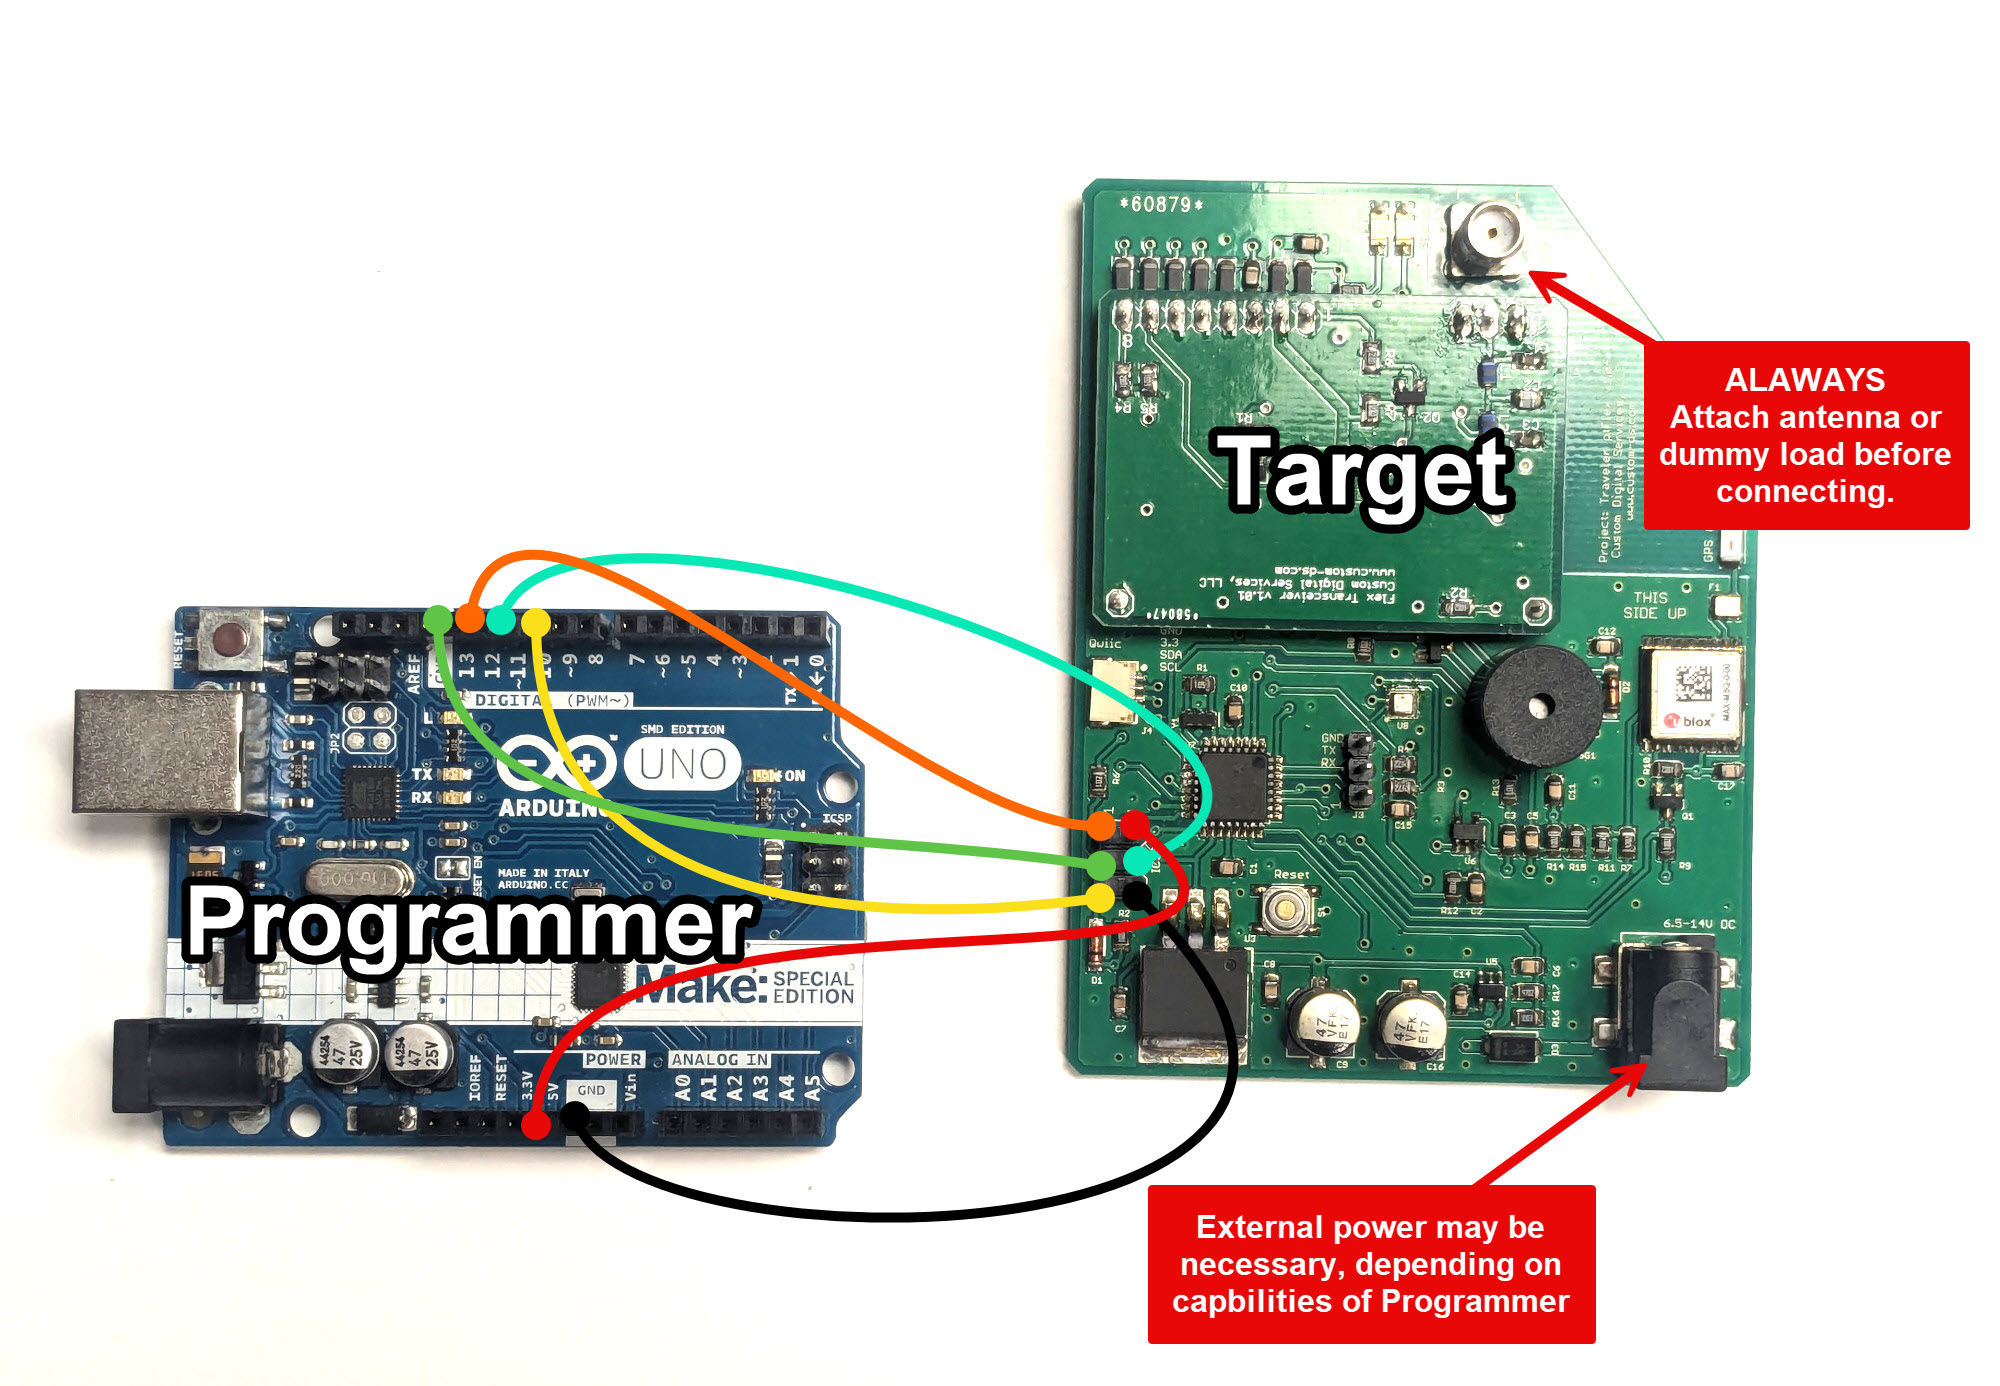
Once the Arduino as ISP firmware has been loaded, connect the "Programmer" to the ptFlex (or ArduinoTrack) Target device using the wiring diagram as shown.
For more information about using the Arduino as ISP process, see the Arduino Website.
Preparing the IDE
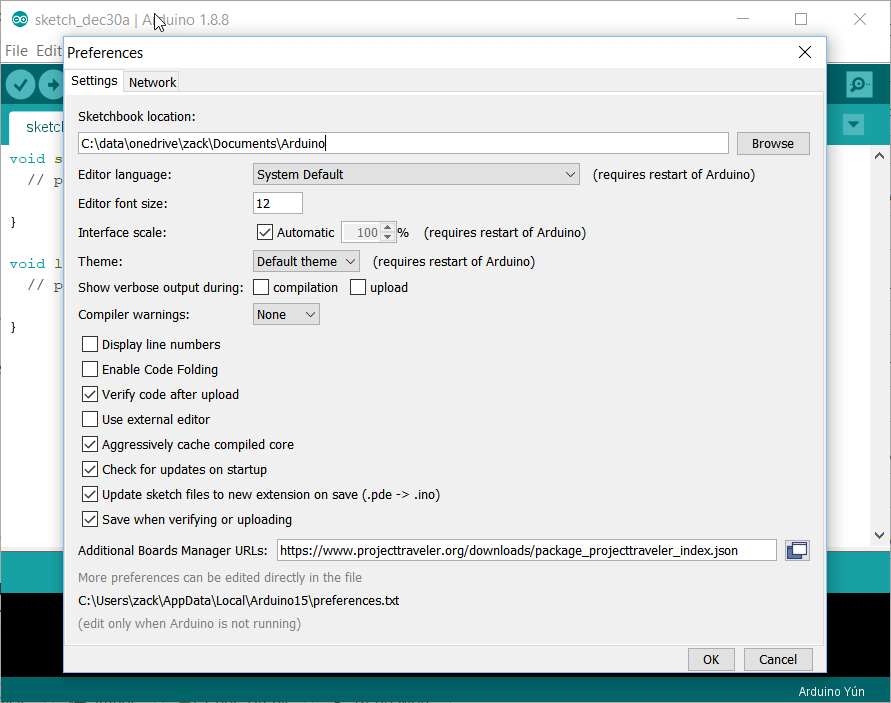
In the Arduino IDE and go to File-Preferences. In the Additional Boards Manager URLs field, add the URL to the Project: Traveler website .json file:
https://www.projecttraveler.org/downloads/package_projecttraveler_index.json
Note that if there's already something in that field, you can click the small icon to the right of the text field where you are allowed to enter multiple entries on multiple lines.
Click OK to close the preferences dialog. Then go to Tools-Boards-Boards Manager.
When the Boards Manager opens, select "Contributed" from the Type drop-down. In the resulting list, you should find the Project Traveler Boards by Project Traveler option. Click the Install button in the lower-right corner.
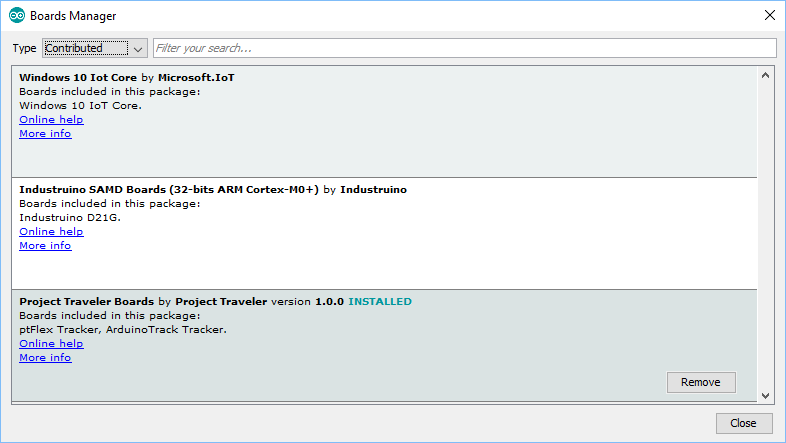
Close out of the Boards Manager dialog, and the back under Tools-Board, you should see "ptFlex Tracker (Arduino as ISP)" near the bottom of the list.
Setting the Controller Flags
If this is a brand new pfFlex board that has never been programmed before, there are several commands that must be run from a DOS command prompt. If the ptFlex was purchased as an assembled and tested kit, you can skip these steps.
Open a command prompt on the PC.
C:\> cd \Program Files (x86)\Arduino\hardware\tools\avr\bin
C:\Program Files (x86)\Arduino\hardware\tools\avr\bin> avrdude.exe -p m328p -b 19200 -c avrisp -C ..\etc\avrdude.conf -P comX* -U hfuse:w:0xD6:m -U lfuse:w:0xFF:m -U efuse:w:0x05:m
This will write the fuses to the new processor. To verify that the fuses have been written, run these commands:
C:\Program Files (x86)\Arduino\hardware\tools\avr\bin> avrdude.exe -p m328p -b 19200 -c avrisp -C ..\etc\avrdude.conf -P comX* -U hfuse:r:highfuse:h -U lfuse:r:lowfuse:h -U efuse:r:exfuse:h
C:\Program Files (x86)\Arduino\hardware\tools\avr\bin> cat highfuse
C:\Program Files (x86)\Arduino\hardware\tools\avr\bin> cat lowfuse
C:\Program Files (x86)\Arduino\hardware\tools\avr\bin> cat exfuse
* Replace "comX" with whatever Com port your ArduinoISP is enumerating on.
Loading the Firmware
To program the pFlex, open the firmware Sketch downloaded earlier from GitHub in the Arduino IDE.
Go to the Tools-Board menu, select the "ptFlex Tracker (Arduino as ISP)" from the list of targets.
The ptFlex and ArduinoTrack boards are automatically configured to use the Arduino as ISP programmer to load the firmware onto the tracker boards, so no further configuration is necessary. Click the Upload button which will cause the Sketch to compile and will program to the ATmega328 processor similarly to how a normal Arduino board is programmed.
Sometimes it is necessary to apply external power to the ptFlex Tracker, depending on how much current the Programmer board is capable of sourcing.