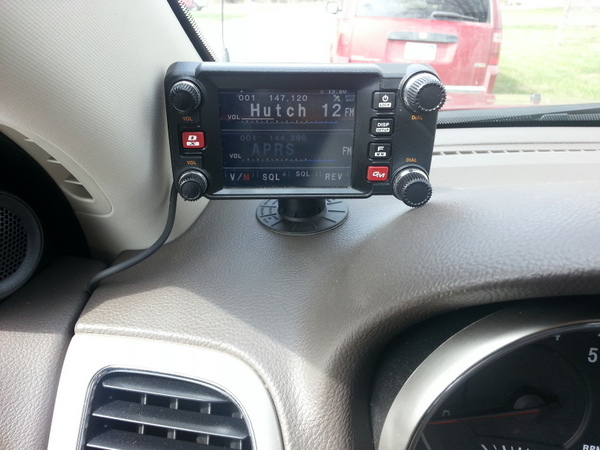
For balloon chasing, a dedicated APRS tracking station with the appropriate software (like Balloon Finder) are key to a successful chase, having a backup APRS rig in the vehicle is never a bad idea. My primary COM/NAV rig is the Yaesu FTM-400DR which I recently installed in a 2012 Jeep Grand Cherokee.
Being a new (to me) vehicle, I insisted on having a fairly clean installation with a minimal amount of permanent damage to the Jeep.
Antenna
I started with the antenna, which is a dual band NMO-mount vertical. While it's not the most efficient location, I've found that a lip-mount on the front hood makes for a simple installation on vans and SUVs (without a traditional car trunk). I picked up a simple, low-profile mount from the local ham shop and attached it to the hood with two simple set screws on the underside. I've done this numerous times, and have left it on vehicles for years on end and I've never had problems from rust where the screws penetrate the paint underneath.
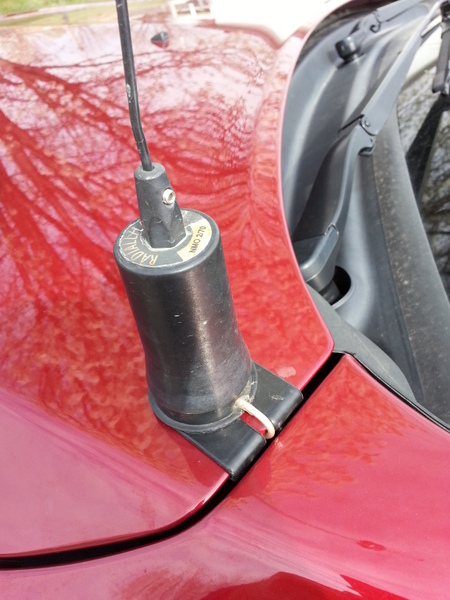
I did make one small modification to the lip-mount however, and that's the replace the first 10cm or so of the standard RG-58/RG-8X coax with a small, Teflon coaxed RG-174. I've had problems in the past where this coax gets pinched and thereby shorted out as it transitions from outside to inside. To make things easy on myself, I bought a short SO-239-to-Something adapter made from RG-174 and cut one end off of it. I was then able to disassemble the mount and remove the stock coax. Once the connections were soldered, I packed the underside of the NMO mount full of silicon caulking to keep water away from my connections.
For the actual radiating element, I reused an old dual-band whip antenna which was made by Larson. I've had this antenna on various vehicles for about 10 years now.
Routing Coax and Power
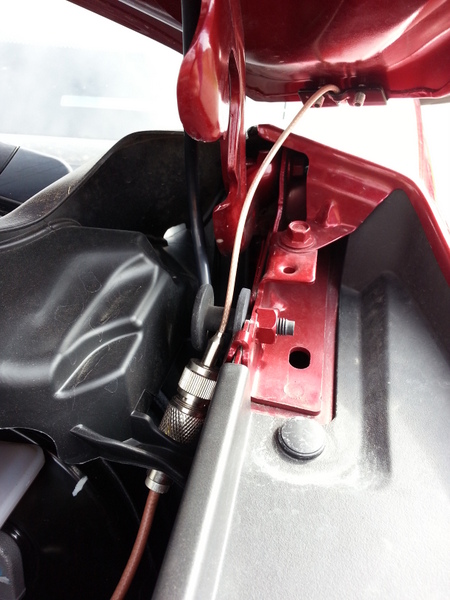
From the RG-174 jumper, I ran standard RG-59 coax from the engine compartment through the firewall. To penetrate the firewall, I used a long drill bit and drilled through the plastic fairings that surround the steering column. I generally try to avoid the steering column, gas, and brake pedals, but in this situation the drivers side firewall is pretty packed full of stuff both inside the passenger compartment, as well as in the engine compartment. I had to be very careful to drill in a location that I could get to, without puncturing anything.
The power routing on the other hand is quite easy. Starting in 2011, Jeep Grand Cherokees now place their battery under the passenger seat in a well under the floor. To attach to the battery, I used some 12ga wire and terminal studs. I placed a 20amp inline blade fuse inline with the positive lead just off the battery. The power cable comes up out of the battery well, and around the backside of the center console where it dips back down into the (empty) well beneath the drivers seat.
Radio Installation
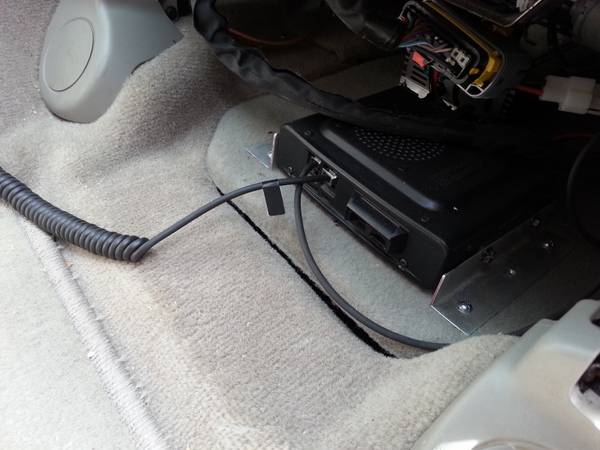
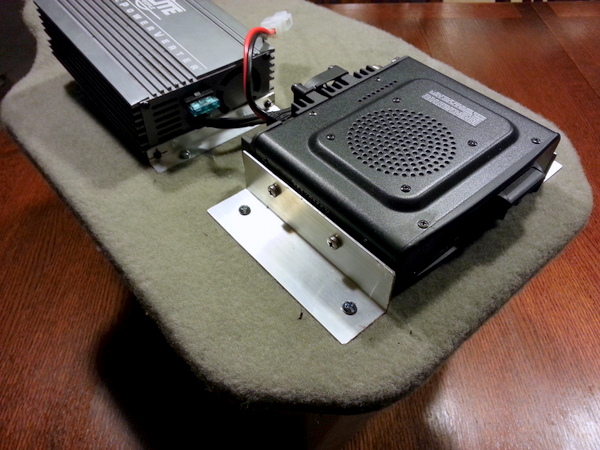
The base of the FTM-400DR is attached to the well cover under the drivers seat, using a few scraps of aluminum L bracket. The well cover pops right out from under the seat, so I took it in to the workshop to do my layout and drilling work. Once the radio (and my 110V power inverter) were installed, I took the unit back out to the vehicle and attached it.
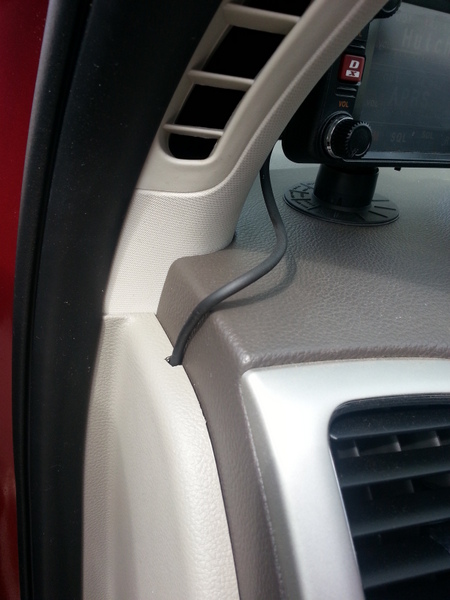
I took a little bit of a different approach on the head unit this time and bought a stick-on mount from the local ham shop. The mount is a quality unit and includes a cleaning solution to clean the dash before applying the double-sided tape. After 3 (winter) months and about 5000km of traveling, the head unit is still nicely stuck and I've had no problems with it.
Routing the cable was as easy as popping off a couple of panels along the drivers side door (in the door frame) and routing the small cable through the hollow channels. I made a small cut in the plastic molding inside of the door frame to allow the wire to exit and penetrate through to the top of the dash.
Installing the microphone was the final step and I will say that I'm not totally pleased with where this wound up. The mic is close to my knee and while I don't normally bump it, it is a bit in the way.
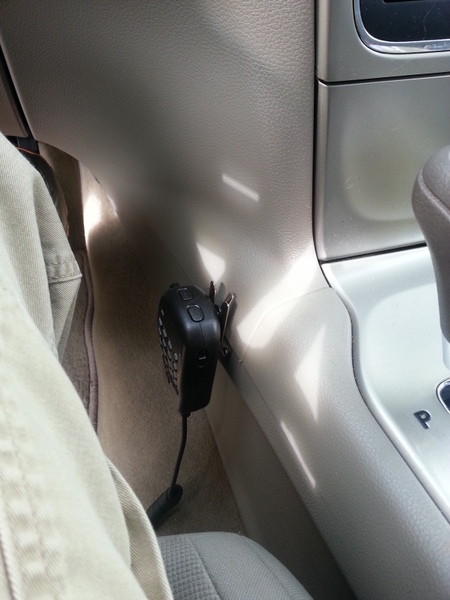
I also need to make a short (10-20cm) extension cable for the microphone as the coiled cord isn't quite long enough to reach comfortably from under the seat up to my mouth when I'm talking.
Here you can see the radio tucked neatly under the seat with the microphone exiting to the left, and the head unit cable exiting to the right.